Introduction
Getting started
We have a set of demo implementations in different frameworks if you need to see the actual code.
If you need any frameworks or languages, feel free to contact us.
General Steps to using Boathouse
Create a Paddle account with least one product and price.
Create your Boathouse account and connect it to Paddle to create your pricing table.
Add the pricing table (in anonymous mode, i.e. IFRAME) to your website.
Create an upgrade page that checks the API for a subscription and offers a checkout of customer portal experience through Boathouse.
Let's look at each one in detail...
Step 1. Creating a Paddle Product
To sell products on Paddle you will need to create a Paddle account. This process usually takes a while, so it's best to get started sooner rather than later.
For testing/development you can also use a Paddle sandbox. Setup is almost identical, but all verification immediate so you can get started right away. You can test everything with a dummy credit card.
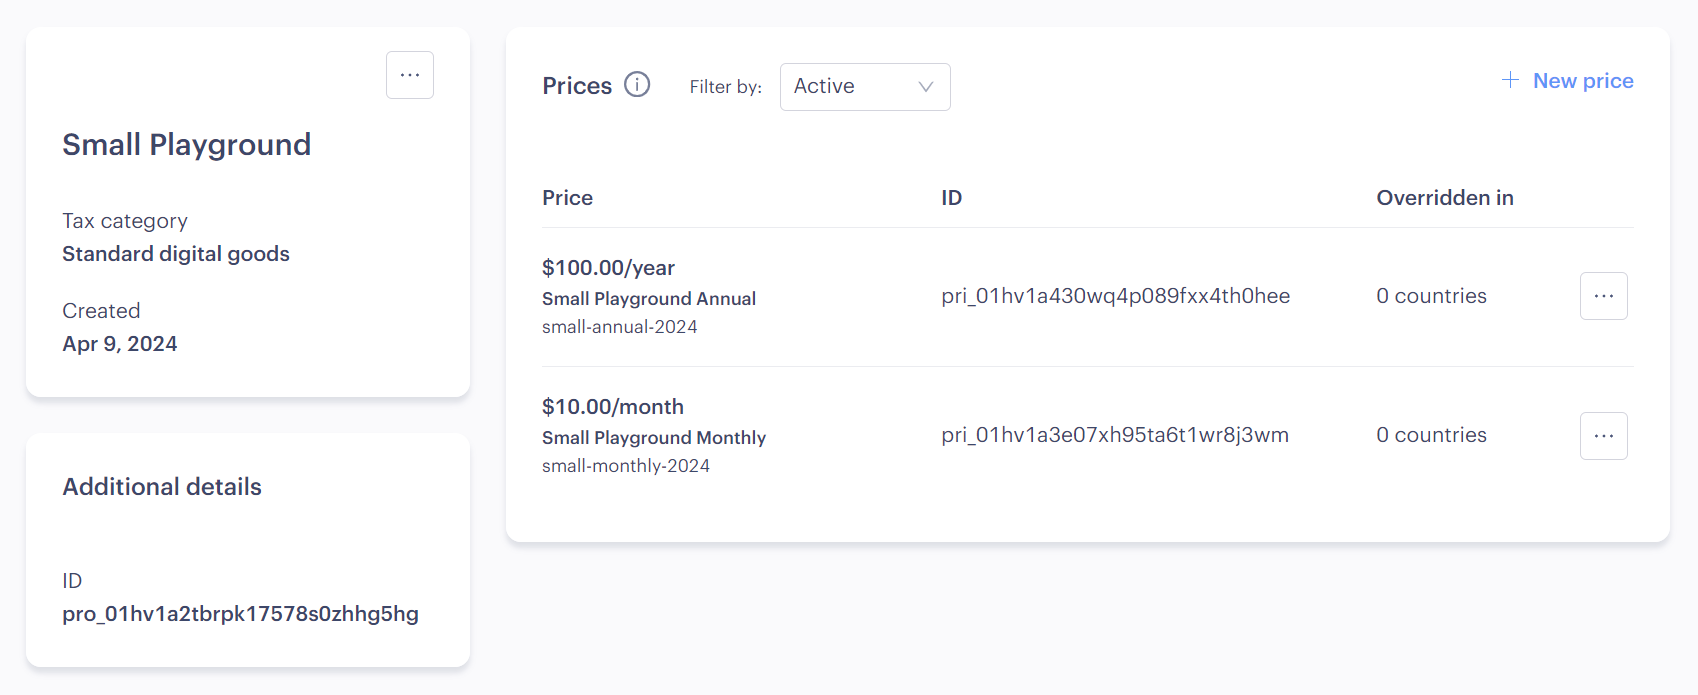
The Paddle team recommends creating your individual subscription plans as products. Then create prices for those products to reflect the different payment options (e.g. monthly, annual).
Step 2. Setup Boathouse
After you've signed up for Boathouse, you will be prompted to connect to your Paddle account. For this you need the API key available from the Paddle Vendor dashboard (Link for Production or Sandbox).
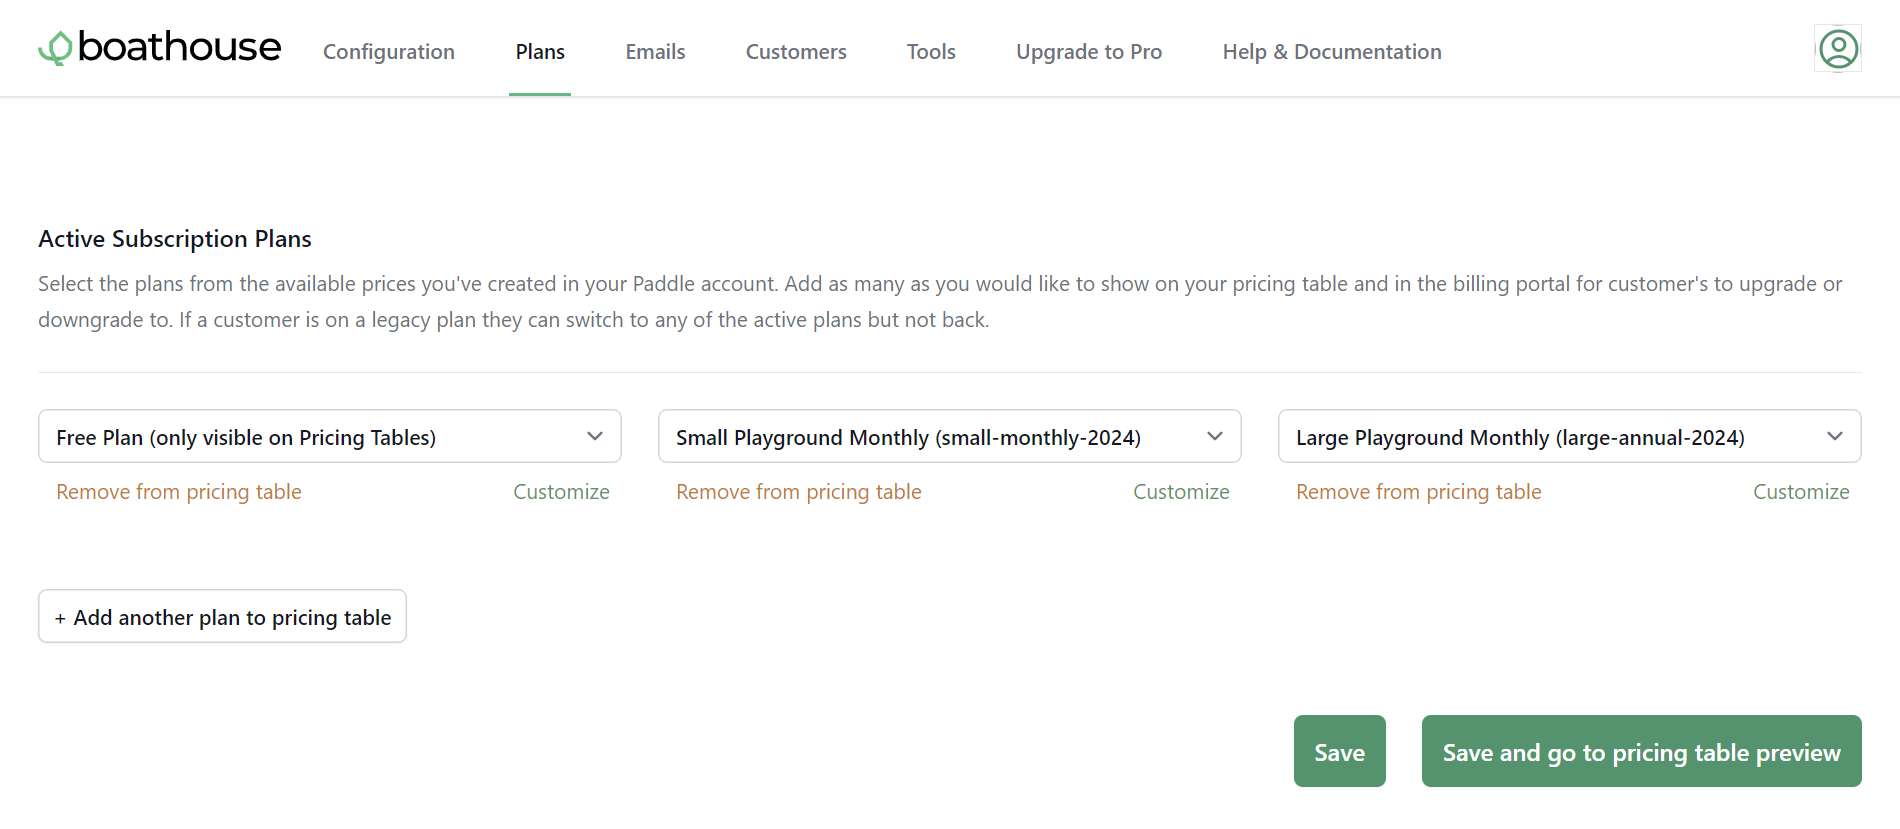
Then head to the plans page. Here you can specify which Paddle items are currently available for customer to subscribe. Start by selecting the small monthly option you intend to offer.
If you have a annual option for that same plan click on Customize to add it. Any other customizations are optional, but can be used to add more information to the pricing table.
Step 3. Add the pricing table to your marketing website
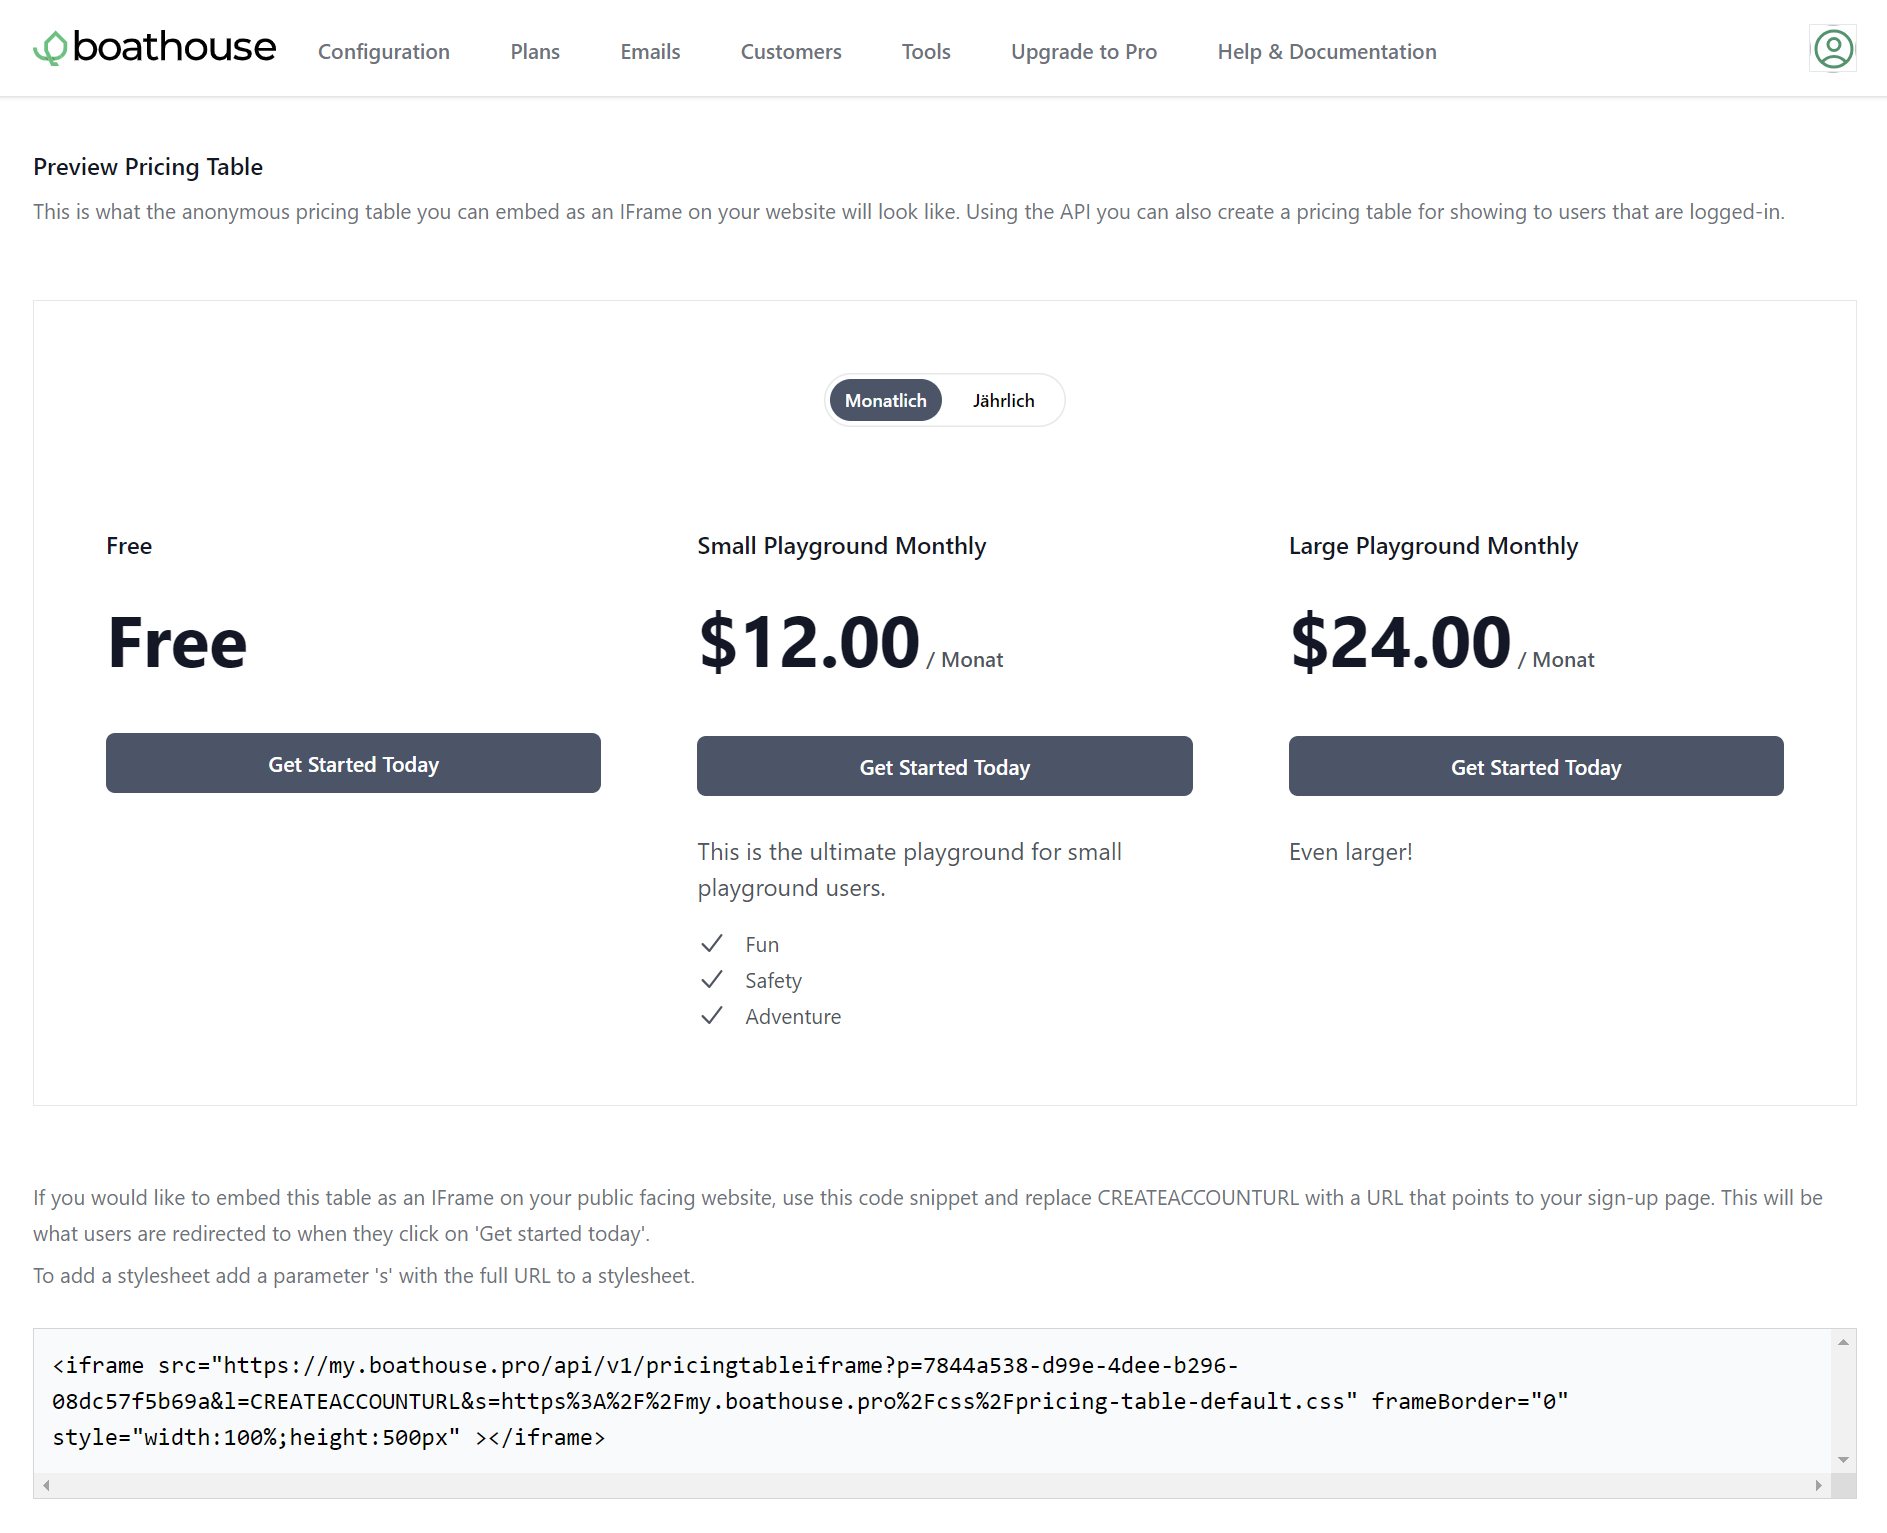
Visit the pricing preview page and copy the IFRAME Code. In the URL where it says CREATEACCOUNTURL replace that with a (url encoded) link to a page where your users sign up for your app.
Add it to your website CMS on the pricing page. The plan information and price will always be up-to-date. If you have currency overrides or automatic currency conversion activated in Paddle then the price will change based on the visitors location.
Step 4. Create the Upgrade Page
Create a dedicated page in your app that you send users to to upgrade or manage an existing subscription. (Example: Laravel PHP/NextJS Typescript/ASP.NET C#)
On page load call the Boathouse API passing in the email of the current user. A Paddle Customer ID is returned, store that with the account in your database.
(Future calls to the API should use the Paddle Customer ID. This allows the user to change their email address but keeps the link between the account in your app and the Paddle customer.)
Check if the API has returned an active subscription. If they do, set a flag on the accout to activate those features and present a link to the customer portal.
If not, use the PricingTableHTML returned from the API and embed it on the page. The user will be presented with your plans and the buttons will initiate a Paddle checkout once you've added PaddleJS to the page.
Configure PaddleJS on the page with a client token from your Paddle dashboard and add a event handler to redirect to a "processing" page.
Paddle.Initialize({
    token: "your_client_token',
    eventCallback: (e) => {
        if (e.name == "checkout.completed")
          location.href = "processing?pids=" +
            e.data.items.map(x => x.price_id).join(",");
    }
});
Add a processing page to display a spinner while you repeatedly call the Boathouse API and check for an active subcription. Let the page refresh every few seconds.
Woohoo
That's it! You've successfully added Boathouse to your app.
Wait, what about cancellations and updates?
In addition to checking for changes in the account page and setting account flags depending on their active subscriptions, you should also do the same check in the login page. If you have long running sessions (i.e. the user does not hit the login page often, you can also implement the call in a timer function that runs once a day).
If you implement Paddle webhooks you will get notified via those as well.
Need any help?
You can reach us via email at help@boathouse.pro or directly schedule a call here.